Home Blog Page 106

Spey Casting Tips, Analogies and the White Mouse

spey casting tips

When was the last time you listened to a podcast or interview that really moved you to do something?  Maybe it was a video that convinced you to actually get out and take action?  How about something as simple as Spey Casting Tips?

I am obviously a little weird and extreme when it comes to fly fishing but that happened to me today listening to Anchored where April was talking to Pete Humphries on spey casting and life.

If you are in the midwest and need a steelhead guide you can connect with Pete at the link above.  Tell him I sent you so we can have a good laugh!

Pete did a really amazing job describing the spey cast using analogies and tips that made it almost like you were watching him fish.

I had to post a short article so I didn’t forget these awesome analogies!  Much of this applies to shorter belly lines so keep that in mind if you are going old school spey.

I’m just going to provide my short summary for future reference (don’t hate me for the choppyness of this post).


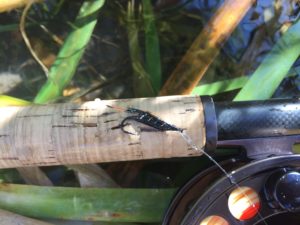
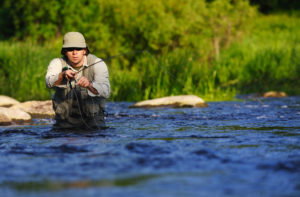
The photo above is from Feenstra Guide Service


Spey Casting Tips with Pete

If you click on this link:  Spey Casting with Pete  I link to the podcast I mention above and start it right where April “Gets Nerdy” which you gotta love.

The Lift

All spey casts begin with a lift!! (Not with a drag)

You need to get your line off the water to begin your cast.


Circle C

If you use a good lift at the start then you can use a Circle C (instead of snap T) and avoid doing a roll cast downstream before each cast.  This will mean your fly is in the water longer.


The Tear

On setting up your anchor, drop your line directly under your rod tip.   This will create less slack and better tear (You will have a better white mouse).

This is different from dropping the line close to your body as happens a lot on a snap T.  I always struggle with this one.


The Sweep

The sweep is the same as the backcast with the single hand rod.

You need to sweep up to the home position (not down).  Never dip.  You can tap the water before starting your sweep to force yourself to always sweep up.

Smoothness is the key!  Slack is your enemy.

The White mouse – He talks to you so listen to him.  The white mouse is the tear you hear as you are sweeping over to 90 degrees with your rod in front of you then up to the home position.  The white mouse also gives you the timing (when he stops you are ready for next step).


Drift

At 90 degress (your rod is pointing directly to other side on sweep) you have to slow down so you don’t pop your anchor.  Then slowly decelerate until you are at the fireing position.

Note:  The great spey casters can hold their D-loop for a long time.

Smoothness in the entire spey cast is the secret


Forward Stroke and Awesome Analogies

The Telephone Analogy – That’s where Pete likes to start his forward stroke.  He’s tells his students 10:30 and 1:30 on the clock.

The Baseball Analogy – I really love this one since I was a centerfileder.  This applies to the trajectory of your forward stroke.  If you are throwing a ball towards home plate from outfield you aren’t going to release the ball parallel to the ground.  You are going to release it at a higher trajectory so the ball goes a little upwards.

Same with the spey cast.  We are not shooting this thing into the water.

The Dining Room Table Analogy – Imagine that there is a dining room table in the river out in front of you where you’re casting.  Dry to land the fly right on that table.  Not on the surface of the water.

Look at your elbow to see if you have a good forward stroke.  There should be a bend in your elbow.

The 2 Handed Sledge Hammer Analogy – When finishing the final part of the forward stroke imagine that you have a two handed sledge hammer and you’re driving a nail into the way.  That’s how you want to finish the forward stroke.  (You can’t use your wrist here so don’t use it on your cast).

Grip – Use a light grip on your upper hand.  Try taking your thumb off the cork on the top hand and use your lower hand for the power.


Conclusion

So there you have it.  Kind of random but I think totally worth writing down and sharing.  What was your favorite analogy?  Share it in the comments below.

I wanted to give a big thanks to April Vokey for the podcast and Pete Humphries for the great info.  Take a look at the links below if you have additional questions.

Click on the button below and subscribe if you found a good tip and want the next spey casting article delivered to your inbox.


30 Day Fly Tying Challenge

fly tying challenge

fly tying challenge

I am running a 30 Day Fly Tying Challenge for anyone interested in having an accountability partner along your journey.

Whether you are brand new to fly tying or been doing it for a while a challenge is a great way to change things up and keep it fresh.

Here’s the link if you want to join the challenge:  30 Day Fly Tying Challenge


I will be providing a quick tip each day with a video link to keep things interesting.

You can share your patterns on Instagram with the hash tag:  #flytyingchallenge30

I would love to hear from you if you have an questions.  Send me an email to dave@wetflyswing.com.


Here’s the link ===>>   Click Here to Join the Fly Tying Challenge


How to Tie a Frenchie Nymph – Fly Tying Instruction [Video]

frenchie nymph

I show you how to tie a Frenchie Nymph in today’s fly tying video.  The Frenchie is a versatile nymph that can be tied in multiple colors using UV dub.

Click here to watch the Frenchie Nymph Video:

Please subscribe to my youtube channel if you found this video helpful.


Materials for the Frenchie Nymph

Hook:  Daiichii #1560 Size #12

Bead:  1/8″ Brass Bead

Thread:  Orange Uni-thread

Tail:  Grizzly Hackle (stiff)

Rib:  Medium Copper Wire

Body:  Pheasant Tail

Thorax:  Orange UV Dub


Show Notes

Here is the link to the tasty IPA I enjoyed while tying this pattern:  Union Jack

The tune was provided by Ben Sound Music.

Here is a video for a lightning bug, a similar pattern to the Frenchie tied by Tim at Trout and Feather.

If you need any additional help you can reach out to me anytime with your questions.  Please click the green button and subscribe if you want the next post delivered to your inbox.


Do You Struggle as a Dad

struggle as dad

Fuck!  I struggle as a dad!

I love my kids more than anything, there’s no question about that.

But, there are times when I just suck at dadhood.  My kids are 3 and 5 now and have more beauty and passion than I could have ever imagined.

It’s amazing.

So why do I let work get in the way of getting outdoors with my kids?  Maybe it’s because I dream of a better life in the future for them.  A time when I will be in a situation where I will have that lifestyle business so we can travel more.

So I can do more fishing trips with them.  I just don’t have the resources todo everything I would like to right now.

I don’t think I will ever have all of the resources which is part of the reason I’m writing this.

Don’t wait until everything is perfect to get out there.

Get out today

Go do something or make sure you have a trip setup with your kids to go fishing.

There are lot’s of other tips out there to get you thinking about how you can do a better job as an outdoors father.

I’m going to try and dig in a little today to show you what changed for me.  I hope you can dig into your stuff as well so you can understand it’s ok to struggle as long as you continue to work.

Here’s what changed for me……..


First Steelhead Trip with my 5 Year Old

I took my 5 year old on her first steelhead trip recently.  She’s been on the river and floated through some stuff before but it’s never been the daddy daughter one on one all steelhead trip.

Maybe I was pushing it a little bit chasing one species that can require a crazy amount of patience, but It was F’n great!

I kept the fishing short and didn’t stand out there for hours.  We jumped in and made some casts then I let her go back to her toys in the dirt on the river bank for mini breaks.

I remember an old friend of mine, Charlie who mentioned that he burnt his kids out on steelhead fishing early because he would have them out all day on a drift boat in the cold.

fly fishing

Maybe a little extreme.  I never forgot that.

At the end of this trip she was casting well enough to hook into a fish.  The next step is to just find a run that’s easy for her to land one.

Now, I can’t wait to get out this weekend and do a little trout fishing.  Work on the back cast a little and talk about bugs.

Bugs!  They frickin love bugs.  I’m a proud daddy.


Your Call to Action

If you don’t have a trip planned right now get one on the books.

Don’t wait for the perfect trip and instead just get out and do it.

Give up something you don’t need in your life to make more room for them.

Here’s just a few things I have given up that were time wasters for me —>  TV.  Sports.  Partying.  alcohol, etc.  Ok, maybe a little weed every once in a while is still ok.

If you are new to fly fishing and would like some help getting started click here to see what gear you’ll need.

Or, just take a look here and some of my other fly fishing 101 posts.


Conclusion

My kids are going to come out of this year dominating the river.  I just need to make sure their swimming gets up to par and we get that cast nailed so it looks sweet.

I am looking into the future now and seeing two bad ass adult fisherwoman.  Waste deep in a steelhead run that’s a little on the edge.

Trying to get one more swing in there before having to drop out of the run.

Meeting back at camp to tell the story of that subtle hookup that turned out to be a story for the year.

And preparing for the next morning for another chance.

Girls, if you are reading this now at some future point please leave a comment and tell me that I was on the right track here and you have some fish stories to share.

Help the next generation keep up the passion and the love.

Who’s with me?

If you have a story about your last amazing fish leave a comment below.

Click the green button below if you like this article and want more like it delivered to your inbox.


How to Tie a Teeny Nymph – Fly Tying Tutorial

teeny nymph

In todays video I demonstrate how to tie one of the easiest and most effective flies for any fish species, the Teeny Nymph.  I tie a trout fly style nymph on a size #12 hook with natural pheasant tail for the material.

Click here to see how to tie the Teeny Nymph:

This has got to be one of the most basic flies to tie when it comes to materials.  Grab a little pheasant tail and you are good to go!

Hook:  Daichii #1710 Size #12

Thread:  Uni thread

Body:  Pheasant Tail


The beauty of this fly is the simplicity of it.  It’s also buggy and sparse, two of the features I love in most of my flies.  You can reach Jim at JimTeeny.com for any questions or to pick up some flies.

There are a bunch of other variations of the teeny nymph so feel free to expirment with different sizes and clors.

If you have any questions or need additional help check out the FlyTyingMentor.com fore more personalized instruction.

Click the green button below to get new nymph videos delivered to your inbox:


How to Tie a Blood Knot – Fly Fishing 101

blood knot

I show you how to tie a blood knot in today’s fly fishing 101 video tutorial series.  The blood knot without question is one the the greatest fly fishing knots of all time.

A knot that may be a little harder than some up front but is actually pretty easy once you practice a bit.

It is used to tie leaders together and works really well when using different size diameter leaders.  Take a look at the video below and leave a comment if you can!

Click Here to watch the video on Tying the Blood Knot:

It would be amazing if you can click on the video and click like if it was helpful.  Please also subscribe to my channel so you don’t miss the next video.


How to Tie a Beadhead Flashback Hares Ear – Fly Tying Video

hares ear

I demonstrate how to tie a flashback hares ear in todays fly tying video.  This is a little variation from the original because of the brass bead and flashabou wing case but works pretty perfect.

Click here to watch the video on Tying the Flashback Hares Ear:

Hook:  Daichii #1710 Size #12

Bead:  1/8″ Brass Bead

Thread:  Size 70 Ultra thread

Tail:  Pheasant Tail

Rib:  Gold oval tinsel

Body:  Hare’s Ear Dubbing

Wing Case:  Pearl Flashabou

If you have any questions or need additional help check out the FlyTyingMentor.com fore more personalized instruction.

Click the green button below to get new nymph videos delivered to your inbox:


Fly Tying Instructions for Beginners – The Fly Tying Mentor

Fly Tying Instructions for Beginners

Fly Tying Instructions for Beginners

It’s kind of crazy I haven’t written this blog post yet.  After creating The Fly Tying Mentor which is essentially Fly Tying Instructions for Beginners, I didn’t really explain fully to the world how it is valuable to someone who is new to fly tying.

I’ll do this today so you understand why you might want to get involved in the Fly Tying Mentor.

I created this course because I believe that everyone should tie their own flies.  Jay Nicholas made this point in a recent interview I did with him on fly tying and steelhead fishing.

Jay made the point that it’s not too different than the caveman sitting around the night before the hunt, sharpening his tools and preparing for the hunt.

We are sharpening our tools and doing the same thing with fly tying.

It’s really that visceral connection with nature.  There’s nothing more powerful than catching your own prey on a weapon you creating.

Ok, that may be a little extreme but gives you something to think about.

-A little fish food for thought-

Before I get into the details of why the Fly Tying Mentor is useful for you, especially given the fact that there are more fly tying videos online than porn (not true by the way), I want to tell a little bit about my story.

Click this link to watch a short video about the mentor:


Dave’s Short Story

I won’t go into detail on my story here but want to note that I have been tying flies since really before I can remember.  My dad owned a fly shop back in the day and I spent a good part of my childhood there.

You could find me at the sportsman show tying flies in front of the passers by.  It was fun and something I never fully got away from.

I bring this knowledge to you in the Fly Tying Mentor.

Fun Fact:  I love old country.  Give me a little Johnny Cash or Merle Haggard on a road trip to go fishing and I’m pretty much good.

Fun Fact 2:  I just got a new camper trailer and is something I would have never thought I would have purchased.  But now with small kids, a cold winter and fishing to be had I see the benefit of one.

You’ll hopefully see me tucked into the side of a remote steelhead river this year tying a few flies before heading out to swing a few flies.

(Am I a weeny for buying a trailer – let me know)


Fly Tying Instructions for Beginners (The Fly Tying Mentor)

(aka – the mentor)

As I said before, I believe all fly fisherman should learn to tie flies.  I believe that this connects us with fly fishing more and keeps you more connected to nature (remember the caveman thing above?)

So, here are the basic value pieces you get with the Fly Tying Mentor:


1.  Fly Tying Courses

The first and most basic piece of the mentor are a series of step x step guided fly tying courses to walk you through tying flies from beginning to end.  These include basic tools and techniques and types of flies, along with other bonuses.

The first course is very basic and will take a person who has never tied a fly through the process of tying their first 6 fly pattern types.  Your will get videos and action items throughout to keep you going strong.

Why is this helpful given that there are 1000’s of tying videos on line?  We believe that some people like to have things set up in a step by step fashion.  Although you can find it all on you tube, you won’t find the step x step instruction and group coaching we provide in the mentor.

{There is no replacement for step x step guided instruction}

2.  Fly Tying Materials and Tools

fly tying

If you are a beginner we will deliver fly tying tools and materials to your doorstep.  I have accounts with some of the best fly material manufactures in the country and can offer these materials to you at a discount.

You will get a vise, bobbin, scissors, thread and a hair stacker to get you started.

Each fly that we learn will come with the materials to tie 12 of each pattern.  This is just the right amount to get you started on your way.

Of course, if you ever need more I will be there to serve you.  You will have a open door to me any time you have questions.


3.  Group Coaching

When you join the group you will be connected to a new and growing community of fly tyers who are at similar and different stages as you.  So you can connect with the community if you have questions.

There is this concept of a mastermind group which is essentially a small group of people coming together with similar goals.

The idea is that you will grow more and have a support group which will help you succeed.

Of course, I will be in there as well moderating and answering questions as we go.  At the beginning, the beta group will be small, so although there won’t be a huge amount of students.

You will get the benefit of having a more personal connection with me.


4.  Local Meetups

I will be coordinating monthly meetups around the world so you can meet in person if interested in making a connection with others in the mentor group.

Although the online world is super amazing and useful there is no replacement for meeting up in person to tie a few flies.  I am super excited about continuing to build these local meetups.

Click here if you are interested in starting a local meet up in your area.  (add “local tying meetup” in the subject line of your email).


5.  One on One Coaching

For a select few who are interested I’ll be offering one on one coaching.  This is a chance to scale up your discovery process as I’ll add extra tips and tricks as we go.

You will be able to send me photos of your flies and I can provide feedback as well as the potential to do an online skype video so I can walk you through some of the stages.

If interested in this just click here and let me know.


6.  New Courses

I will continue adding courses as we go so you can get more specialized in your tying.  Maybe you are interested in steelhead flies, or dry flies or bass flies.

I’ll have you covered.

As I connect with more of you during the beginner course I will be able to provide more specific information tailored to your specific needs.

I need to hear back from you so please respond as you have time!


7.  Guest Tyers

I will be providing a connection to guest tyers who will be helping to create new course content as we verify where the biggest needs are.

All of our tyers will bring a new spin to the vise and provide tips and tricks that you wouldn’t have though of.


fly tying mentor


Subscription Cost

We offer three basic options to get started.  click here to see more details.

Option 1:  $9.99 per month – You get all of the video course work, group coaching, one on one coaching and local meetup information.  You will also be grandfathered in after the beta release for all new material that I release.

Option 2:  $19.99 per month – You get everything in option 1 plus you get fly tying materials for each pattern delivered to your doorstep once per month.  This will include a new pattern we are working on for the month.

Option 3:  $29.99 one time fee (then $19.99 per month) – You get everything in option 1 and 2 plus you get the basic tools for fly tying.  This includes a vise, scissors, bobbin and thread plus a bonus each month (this is a surprise!).

If you aren’t interested in a monthly fly tying box or step x step course work you can always check out my free videos here. 

If you have any questions about the mentor you can send me an email anytime.  Unless I’m on the river I’ll respond within 24 hours or less.


Conclusion

If you’re interested in detailed step by step Fly Tying Instructions for Beginners and fly tying materials delivered to your door then the Fly Tying Mentor is what you need.  I offer everything listed above plus a boat load of passion that I know will rub off on you.

Did I tell you I hope to support my kiddos with this product:

There’s no reason to do this alone.  Lean on me and the group to discover fly tying together.

All great people throughout history have been a part of a mastermind group.  The mentor is that group for your fly tying discovery journey.


Click the green button below to stay connected with us:


fly tying


How to Tie a Purple Peril on the River and Catch a Steelhead

purple peril

We just got off the river from our annual cast and blast deer hunting and steelhead trip.  During the fishing, hunting and beer drinking we managed to get a fly tying session in.  The Purple Peril was a pattern that killed it that day and is the reason for this post.

Although the deer numbers and steelhead numbers were down this year we managed to bag a couple of bucks and a few steelhead.

I wanted to share what turned out to be a pretty funny video of Greg tying a Purple Peril.  Later that evening Greg proceeded to hook a few steelhead on that fly.

Click here to watch the video on tying a Purple Peril (on the river):

The commentary on the video is just a few guys mid day hanging out.  Between sessions, a few beers and and a good chat can sometimes take up an afternoon.

(note that there is some language not suitable for children (shannon!) but overall it’s pretty mild)

That day we me a cool guy from Arizona who hung out and talked us up.  Matt was just finishing up a month long fishing tour so it was good to catch up on BC.

Also, see if you can recognize the writer of the amazing song that comes on towards the end of the video.

If you like this type of random stuff please share this post on facebook or twitter.


The Habit of Finding Steelhead in All Conditions

reading water


reading water

I give up.

I spent a large amount of time trying to put together the perfect blog post to answer one of my readers questions but at the end of the day I realized that it’s pretty f’n simple.

It doesn’t take a huge article to tell you how to steelhead.  Sure there is the water speed, depth and cover keys, but it’s really all about putting in your time and covering the water and being persistent as noted here.

So, I’m going to save you a bunch of time right up front and tell you that the key to reading water and finding fish is being totally systematic about how you cover the run to find those fish.

The cast, swing, step…… cast, swing, step process is the secret for steelhead fishing.  Unless you have hooked up before in a run it’s not always a given that you can find all of the buckets within the run using your glasses, or any other method.

There may be a ledge the fish love down there, but you might never know unless you cover every foot of the run.

It comes down to the habit of finding steelhead.  Your habit of systematically covering every steelhead run will be your key to success.

Here’s the questions that I received from a listener this week when I asked her about her struggles with steelhead fly fishing:

My biggest struggle around fly fishing for steelhead is where to find fish depending on the water conditions. I’ve been steelheading for a few years now, and no matter how many days I put in, I always seem to be fishing in the wrong place compared to the success of others on the river fishing similar set ups. I’d love any advice on knowing where to look in high flow vs low flow water situations. Runs vs pools vs pocket water, etc.

I will provide a few tips below but at the end of the day it’s just about putting in your time.

I have had plenty of slow and skunked trips on new water and had to put my time in.

Eventually you hook up and that starts the ball rolling.  You find one spot where you hook up and now you have that spot in your back pocket for next time.

Now, I’ll cover habitat types because I think this is a topic that should be understood to understand the fish we chase.

But first, why I love the rain and how that relates……..

I just realized this week that I love the rain.  Maybe not an epic thing to say for some people, but for me it’s like stripping off my clothes and running naked around the city.

I thought that saying “I love the rain” was a weird thing to say coming from a place where it rains about 90 inches per year and people commit suicide because of it.

I think I was almost convinced recently that I needed to live somewhere south where it didn’t rain much or at least was warmer when it rained.  That I had to hate the rain.  For some the rain is depressive.

For me, it means that the steelhead are coming.  Nature’s sign that there is a higher calling for the silver flash we all search for.

I actually love the cool temperate rain we get out here in the NW.  It never gets too cold or too warm, kind of a moderate in between.  You do have to handle the sometimes months on end of rain everyday occasionally but I think I’m good with that.

For steelhead, rain is also a good thing.  Without the heavy rain we get here we wouldn’t have the same type of fishing we have.  The connection between the heavy rain, the huge forests, fish habitat and those steelhead is something that only occurs at this level here.

I won’t go into depth on the habitat side (I’ll save that for later if interested –> click here if you are and let me know) here but will say that the NW was made for steelhead.

Given that we do sometimes get double digit rainfall totals in a weekend, this means the rivers can get really high.  And on the east side of the mountains in the rain shadow areas, we only get 10 inches or less per year.  So, the rivers can get very low as well.

Give that we get very low and very high flows and all types of variation in the middle, how do you find the steelhead when trying to hook one?

Do they hold in the same areas in high vs. low water?

Are there easy things you can do to reduce the effort you spend finding steelhead?

Is there a way to walk up to a steelhead run, take a look and have a good idea where to start fishing?

I’ll share a few tips today that will help you understand how the steelhead adapts to live in a changing environment and how to hook into more big steelhead.

How to find steelhead in low and high water

Before you can catch a steelhead you have to find them.  bottom line.  Regardless of your rod, your fly, your presentation, your skill, you have to find the fish first.

But where in the heck do you start?

How about high vs low water?

I covered general characteristics and tips of reading water here.  I cover water speed and water depth in this article.  Today, I’m going to cover the fish cover piece of the puzzle as it relates to high and low water.

Before we get into the details of the behaviors of steelhead and how they find cover, let’s look at the different habitats.

Habitat Types

Let’s take a step back and look at the different types of habitats the we have in a typical river and then apply this to steelhead.

Head of the Run – This is where the riffle flows into the pool.  In low water this can be a good place to find fish if there aren’t great habitats or structure in downstream parts of the run.

Pool – This is the deepest and slowest part of the run.  This part is usually too slow for steelhead to hold in (remember walking speed).

Run or glide – The part of the pool that shallows up and eventually turns into a tailout.  This part of the run can hold fish in high and low water dependent on the type of cover and structures is available in this area.

tail out – The part of the pool/glide just before it breaks into the riffle.

riffle – The turbulentt part of the run that usually does not hold steelhead because its too fast.

pocket water – Pocket water is kind of a hybrid unit but can be part of any of the above habitat units.  If the speed is right, steelhead can hold in these areaa.

Now that we understand a little about the morphology of a river let’s look at fish cover in more detail and how it applies to these habitat units, then we’ll look at some tips.

Fish Cover is the Key

We now know two places we don’t generally look for steelhead (riffles and deep part of pools) and know that fish will be in the main run down to the tail out where there is structure and resting places.

Now, within this area how do you find them?

If you can’t identify structure below the surface in a run by just looking, you will need to just cover the entire run slowly to find fish (remember a tip or tap is a fish-link to my article)

Generally speaking, you won’t find the fish in the heavy parts of the current.  Fish are always trying to find the easy path up and to rest.  So look for areas where they can rest.

On the inside of seems, along current breaks, and in the part of the run around structure.

In low water they are looking for cover.  You will need to look in the deeper parts of the run and around structure.  In low water you will likely find them in the thalweg (deepest) of the run where current’s aren’t too strong.

General Tips

  1. look for the road pullouts – When you are new to a river and you have no idea where to go, look for the road pullouts.  (I got this from Jay in a recent interview).  Take a look at the run and give it a go.
  2. Once you are in the run, make sure to fish the run systematically step x step
  3. If others are in the area remember where they may have hooked up.  Next time you are in the area you will know where one fish holds.
  4. Remember a tip and tap is a steelhead.  Don’t forget the subtle touches of a steelhead.  These are important cues and may mean the difference between a fish and a skunked day.
  5. No sand – Sand is usually deposited in the slowest parts of the run so if you see sand, don’t fish it.
  6. Don’t fish the really slow or really fast water of any run  – We are looking for walking speed
  7. Check out your rivers in low water.  Go to the river during the summer so you can see the structure better in the runs.  Make note for later.

Conclusion

Create a habit of being systematic with your steelhead fishing.

Understand the habitat types and where fish hide.

Appreciate that you are not weird if you love rain.

If I missed anything here I’d love to hear about it.  Do you have a nice tip on finding fish that might help shemia?  Add it in the comments.

And if you’re interested in the right spey rod for steelhead, Click here to see the Echo Spey Rod that has helped me drastically improve my spey cast and find more steelhead at a super reasonable cost (You also get a free spey line if you pickup the Echo Spey).  By the way, the link above is an affiliate link, which means I earn a commission if you do end up purchasing through that link.  It’s at no extra cost to you, and please if you have any questions related to this product, please let me know and I’d be happy to answer them for you.

         
Support Our Podcast Sponsors         
Support Our Podcast Sponsors       
Support Our Podcast Sponsors         

Support Our Podcast Sponsors

         
Support Our Podcast Sponsors         

POPULAR ARTICLES